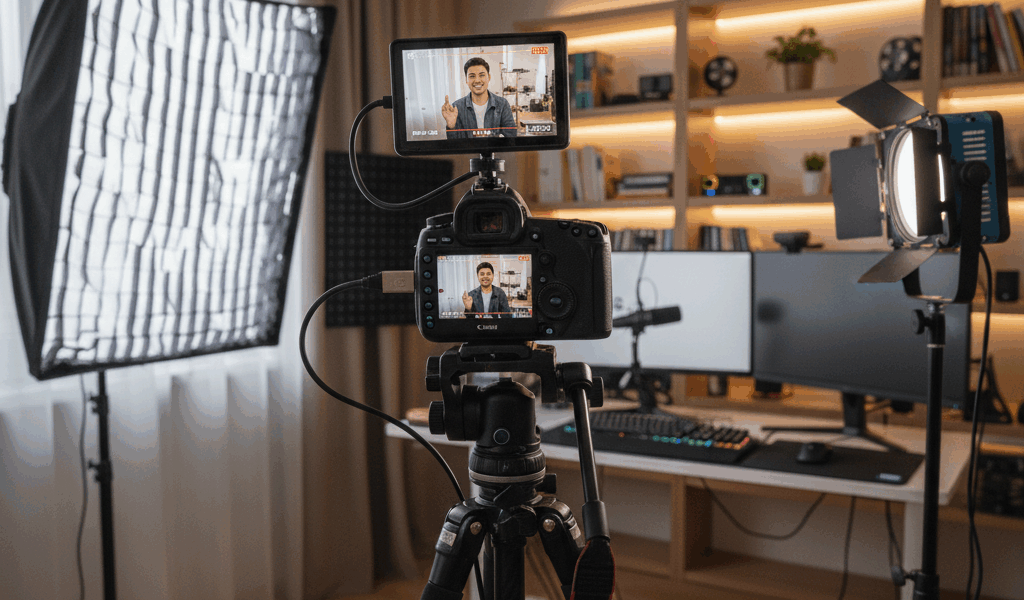
How to Record YouTube Videos

Recording YouTube videos is a powerful way to share your ideas, knowledge, and creativity with a global audience. This guide covers the basics and dives into essential techniques and tools.

Choosing the Right Equipment

Start with equipment that fits your budget but meets basic quality standards. A good camera is crucial. You can begin with a smartphone camera, but for better clarity, consider a DSLR or a mirrorless camera. They offer better resolution and control over video settings.

Audio quality significantly impacts the viewer’s experience. A poor-quality microphone can ruin even the best-shot video. Consider a shotgun mic for minimal setup, or a condenser microphone for studio shoots. Lavalier mics are ideal for interviews or when you need mobility.

The right lighting enhances video quality. Natural light is a beginner-friendly option. A ring light or softboxes can help achieve professional lighting. They reduce shadows and highlight the subject effectively.

Scripting and Planning Your Content

Well-planned content ensures a smooth recording process. Start with purpose: what message do you want to convey? Outline your video structure into introduction, body, and conclusion. Write a script or prepare bullet points to organize your ideas.

Plan your shoot location. Choose a quiet place with minimal distractions. Consider the backdrop, ensuring it complements your video theme. Consistent scheduling fosters audience expectation. Decide on video length balancing detail with viewer attention spans.

Selecting Video Recording Software

Video recording software matters for screen capturing or enhancing production. Choose software aligned with your needs. OBS Studio is popular for live streaming and capturing. It’s open-source and offers customization. Camtasia offers intuitive editing features, albeit at a cost.

For macOS users, QuickTime is a simple built-in tool. Windows users might choose Xbox Game Bar for quick screen recordings. Ensure your software supports your desired formats and quality settings.

Setting Up for the Shoot

Prepare equipment before recording. Charge your camera and microphone batteries. Check memory cards for space. Set your camera to the highest resolution your setup allows, often 1080p or 4K for best results.

Place the camera at eye level for a natural perspective. Stabilize your setup using a tripod or proper mounting if portable. Adjust your lighting to eliminate shadows. Test audio levels to ensure clarity without distortion.

Recording Techniques

Start with practice shots to get comfortable with the recording setup. Speak clearly and maintain a natural tone. Engage with the camera as if speaking to a friend. This connection resonates with viewers.

Use framing effectively. Follow the rule of thirds by aligning the subject with imaginary gridlines. It creates more visually appealing shots. Vary camera angles to keep the content dynamic.

Editing Your Video

Editing enhances raw footage. Begin by cutting unnecessary sections. Aim for a concise final product. Use software like Adobe Premiere Pro for comprehensive editing options. DaVinci Resolve is a great free alternative.

Incorporate transitions between scenes for smoother flow. Add background music to fill silent spaces and maintain interest. Be mindful of copyright rules when using music. Adjust audio levels to ensure consistent volume throughout.

Adding Captions and Annotations

Captions improve accessibility and viewer understanding. They are crucial for reaching wide audiences. YouTube offers automatic captioning, but manual adjustments enhance accuracy. Use clear and concise language.

Annotations like call-to-actions encourage engagement. Direct your audience to subscribe, like, or view related videos. Keep these short and relevant, avoiding clutter.

Optimizing Video for YouTube

Optimize videos for better visibility on YouTube search. Choose a descriptive and engaging title containing relevant keywords. Create custom thumbnails. Thumbnails are visual hooks that drive clicks. Ensure they are visually appealing and represent content accurately.

Write detailed descriptions. Describe video content, include a call-to-action, and any relevant links. Tags further categorize your video, aiding in discoverability. Use a mix of broad and specific tags.

Uploading and Publishing

With content ready, proceed to upload. Use YouTube’s upload feature. Track progress through the upload status. Fill in video settings such as privacy options and licensing.

Publish the video at optimal times. Research suggests when your audience is most active. Schedule accordingly for maximum reach. Utilize YouTube’s scheduling tool for planning ahead.

Promoting and Sharing Your Video

After publishing, promote your video across various platforms. Share on social media networks like Twitter, Facebook, and Instagram. Engage with your audience through comments and feedback.

Collaborate with other content creators to reach wider audiences. They provide cross-exposure and lend credibility. Join relevant online communities to share your work and gain insights.

Consider using email newsletters to notify subscribers of new content. Personalized interaction increases watch time and channel loyalty.

Monitoring and Analyzing Performance

Track video performance using YouTube Analytics. Analyze metrics like watch time, audience retention, and click-through rates. These insights inform future content decisions.

Identify which videos perform best and understand viewer demographics. Adjust content strategy accordingly. A focus on high-performing topics fosters channel growth.

Engage with the community through comments. Build relationships with viewers by responding to feedback. It strengthens community bonds and encourages return visits.

By